How to Install A Door Handle


Introduction: Upgrading your door handles is a simple yet effective way to enhance the appearance and functionality of your doors. Whether you're replacing worn-out handles or adding a stylish touch to your home, installing a new door handle is a DIY project that anyone can tackle with the right tools and know-how. In this guide, we'll walk you through the step-by-step process of installing a typical door handle, so you can achieve professional-looking results in no time.
Step 1: Gather Your Tools and Materials Before you begin, make sure you have all the necessary tools and materials on hand:
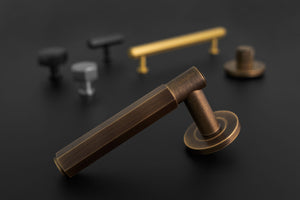
- New door handle set
- Screwdriver (Phillips or flathead, depending on the screws)
- Tape measure
- Pencil
- Hole saw or spade bit (if needed)
- Chisel (if needed)
- Wood filler (if needed)
Step 2: Remove the Old Door Handle Start by removing the old door handle. Most door handles have screws visible on one side of the door. Use a screwdriver to remove these screws and detach both the interior and exterior handles from the door. Once the handles are removed, you should see the latch mechanism and the holes where the new handle will be installed.
Step 3: Prepare the Door Inspect the holes in the door to ensure they are the correct size and shape for the new door handle. If necessary, use a hole saw or spade bit to enlarge the holes to the appropriate diameter. Be sure to measure carefully and follow the manufacturer's instructions for drilling holes at the correct depth.
Step 4: Install the Latch Mechanism Insert the latch mechanism into the edge of the door, making sure it is positioned correctly with the beveled edge facing the direction the door closes. Use the screws provided with the door handle set to secure the latch in place. Test the latch to ensure it operates smoothly and engages properly with the strike plate on the door frame.
Step 5: Attach the Exterior Handle Place the exterior handle on the outside of the door, aligning it with the holes in the door. Insert the screws through the holes in the handle and tighten them securely with a screwdriver. Make sure the handle is straight and level before tightening the screws completely.
Step 6: Install the Interior Handle Repeat the process for the interior handle, placing it on the inside of the door and securing it with screws. Double-check that both handles are aligned properly and tighten the screws securely to ensure they are firmly attached to the door.
Step 7: Test the Door Handle Once the handles are installed, test the door handle to make sure it operates smoothly and latches securely. Open and close the door several times to ensure there are no issues with the handle or latch mechanism.
Step 8: Make any Necessary Adjustments If the door handle is not functioning properly or if there are any gaps or misalignments, make any necessary adjustments. You may need to tighten screws, adjust the latch mechanism, or use a chisel and wood filler to make minor modifications to the door or frame.
Conclusion: Installing a new door handle is a straightforward project that can make a big difference in the look and feel of your home. By following these simple steps, you can upgrade your door handles quickly and easily, giving your doors a fresh new look and improving their functionality at the same time. With just a few basic tools and a little know-how, you can enjoy the satisfaction of a job well done and admire your handiwork every time you open and close your doors.
- Kevin O'Brien